

Is Super Glue Fix All Adhesive Resistant To Petro
Introduction: All About Glue
For woodworking there'southward a few types of glue that are used, but by far the most common is carpenter's mucilage. This type of glue is chosen polyvinyl acetate adhesive, or PVA for brusk. PVA glues are inexpensive and have cracking property ability, making it an platonic woodworking adhesive.
There's lots of unlike types of PVA glue to chose from, but I like to use Titebond Three which is waterproof, has great adhesion, and accepts paints and finishes.
Some other choices for woodworking mucilage include CA glue (cyanoacrylate or Super Glue), hot gum, or polyurethane construction agglutinative (used with a caulking gun); each has its own performance abilities and limitations, but for the scope of this grade nosotros're going to cover common carpenter's glue (PVA).
Step ane: Glues and Grains
Gluing two pieces of wood together is adequately straightforward, but you practise have to pay attention to the pieces you are gluing.
You'll hear the term "wood grain" used in the workshop. Wood grain is the longitudinal arrangement of the wood fibers and is an important aspect to empathize for woodworking. Different types of forest accept different grain structure, just all forest has a "management", this can exist categorized as straight grain (parallel along the direction of the grain) or cross grain (perpendicular to the direction of the grain).
When gluing it's important to know that the two aspects that make a practiced joint are surface surface area, and grain direction. Surface surface area is the corporeality of surface that will be glued together, so a butt joint connection will take less surface area than a finger joint connection.
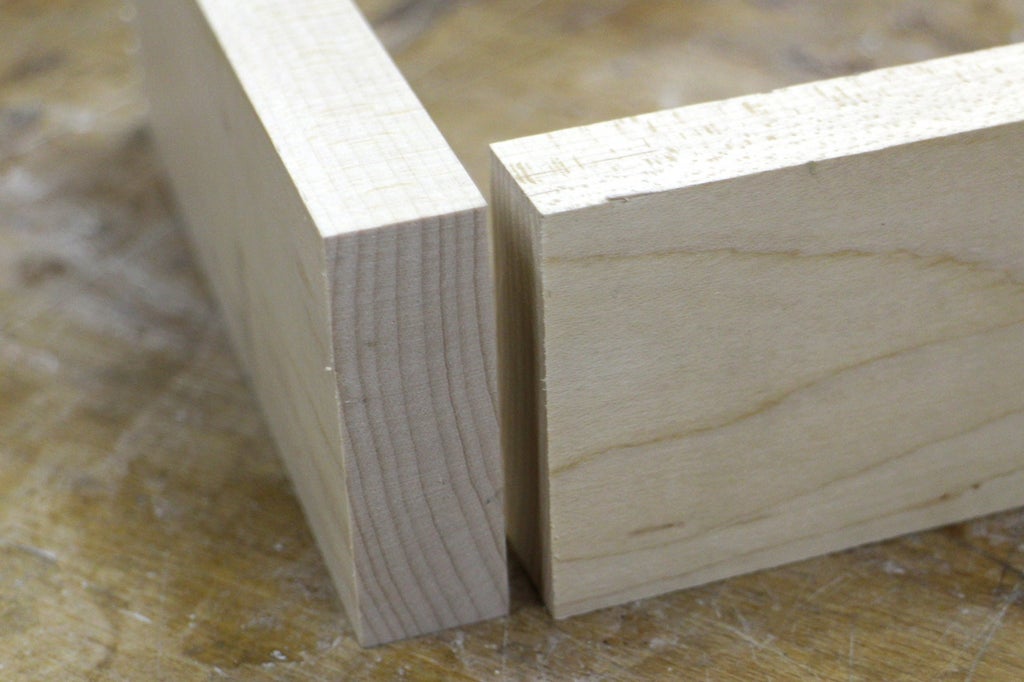
Barrel joints take depression surface area
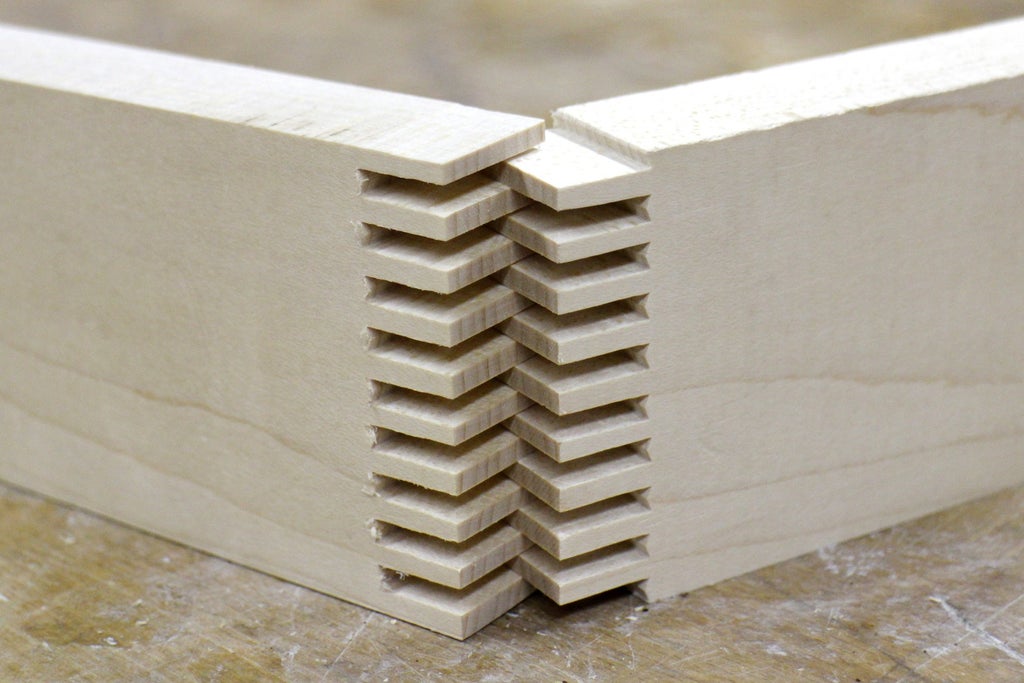
Finger joints take much more area between each finger
The grain direction means that a joint along the management (straight grain) of the grain will exist stronger than 1 that is confronting the grain (cross grain).
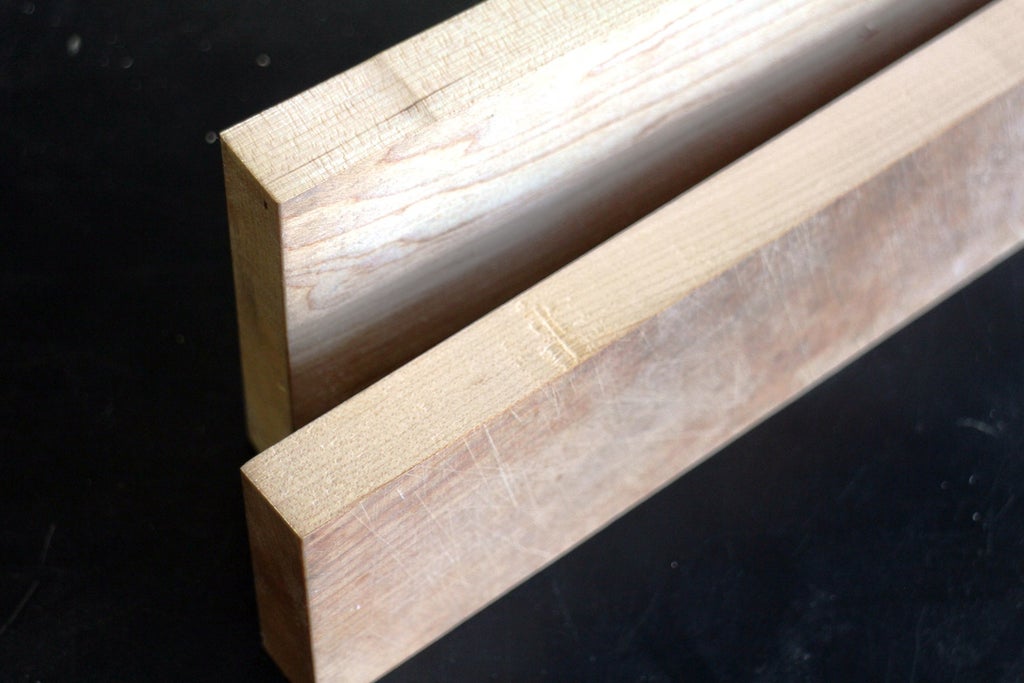
Straight Grain
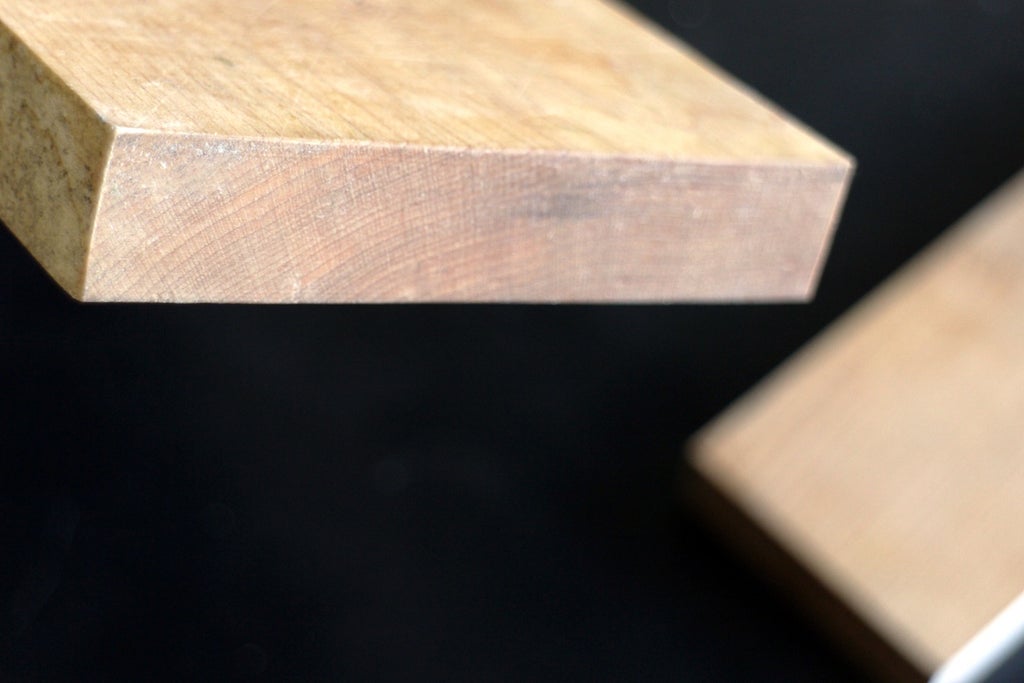
Stop Grain
This is hands seen if you look at the end grain if a piece of wood, the porous end grain doesn't take the same strength as gluing forth the grain. While end grain glue joints tin can work, they will probably fail somewhen or will require some other method to help support the joint. A good everyday example of this is a picture frame, which has mitred corners which are end grain - if y'all look you'll probably see a smash or another supporting joinery which holds the joint together. We'll tackle this exact trouble in Lesson 8 - Bevels and Mitres when nosotros build our ain custom pic frame.
Step 2: Clamps
With almost every woodworking project you lot make you're going to need a clamp somewhere along the mode. Clamps allow yous to hold things together while glue dries, or just hold a piece in identify temporarily while you work on another role. In that location's loads of different types of clamps out there, and yous can never have besides many of them!
Shown above there'south a ring clamp, a bar clench, a spring clamp (as well called an A-clamp), and a ratcheting bar clamp. There'due south enough more than types of clamps out in that location, and they all have a diversity of uses.
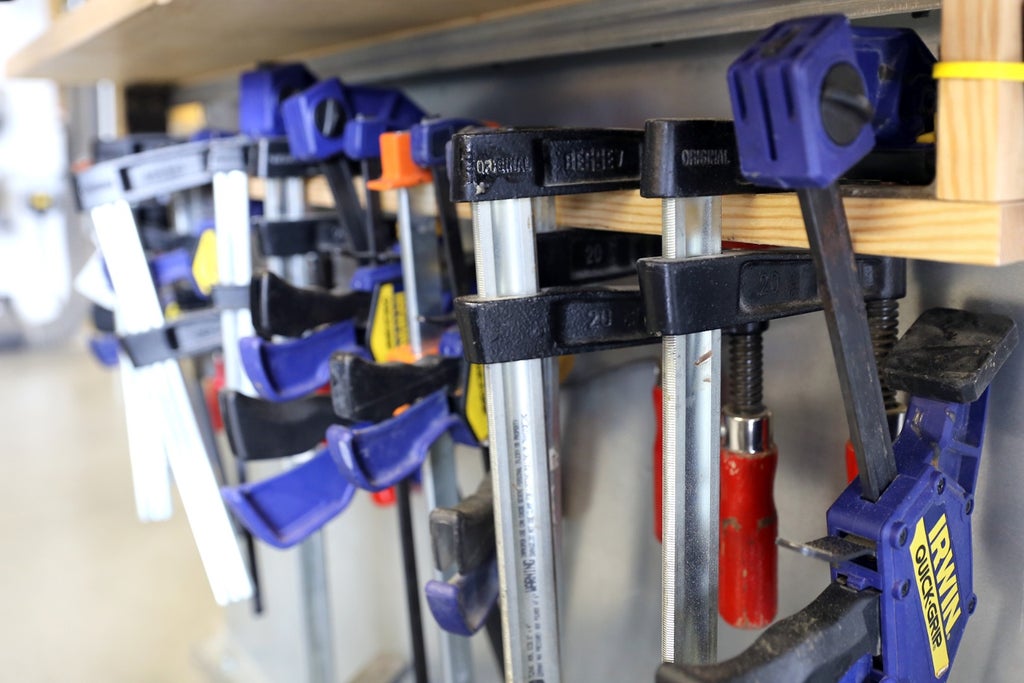
When using glue you're going to want to utilise clamps to proceed your work deeply in place while the glue dries. Invest in a few clamps of unlike types and sizes to outset off to find the type that works best for you, it's ane of the best tools in the shop.
Step 3: Cover Work Area Before Gluing
A common mistake is to start a glue up without covering your work surface area before you start, at all-time this makes a big mess to make clean up just at worst information technology can result in gluing your projection to your workbench! Rolls of "architect's paper" are cheap, just erstwhile newspapers serve the same part and are complimentary.
When your glue dries to the newspaper information technology'll be much easier to remove with a knife, scraper, or sanding than trying to repair damage from having it stuck to your workbench.
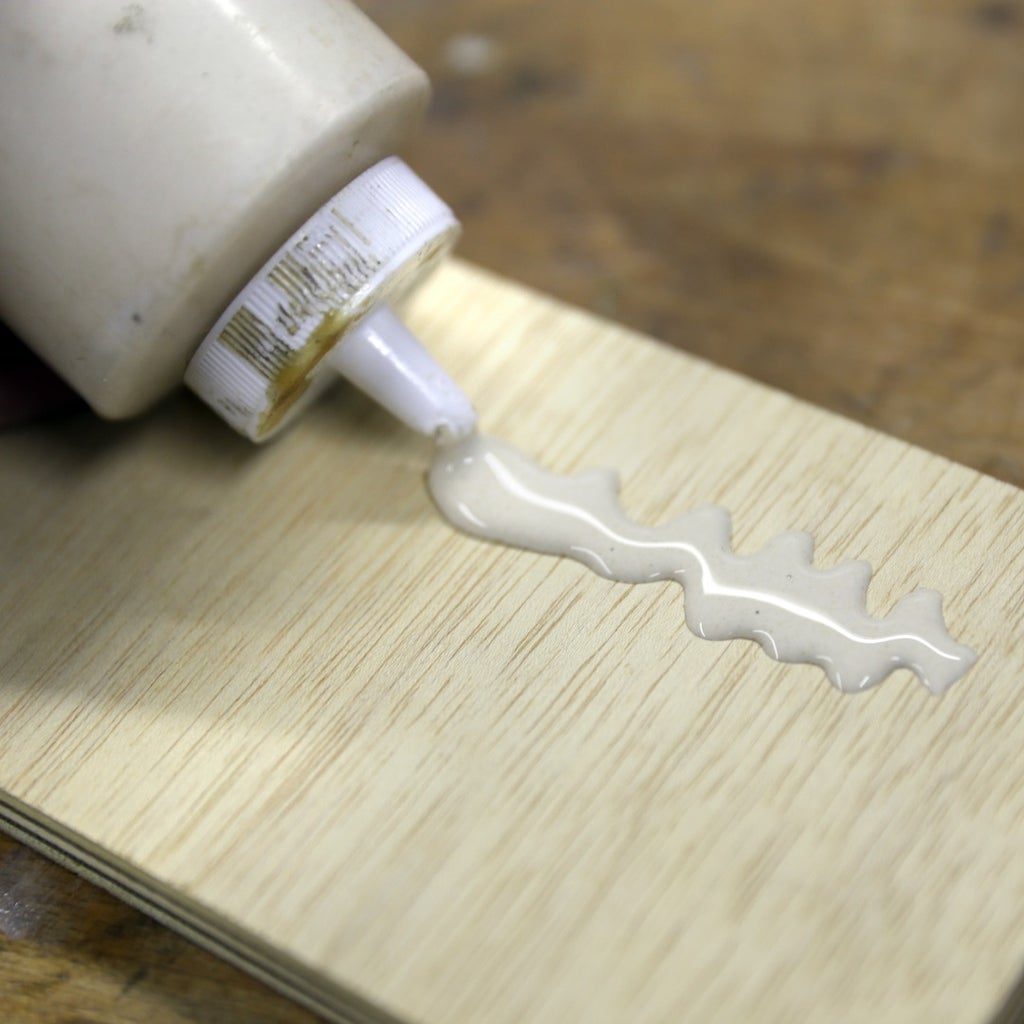
Footstep 4: Glue Awarding
There'south nothing special about applying carpenter's glue, simply it'south important to have intendance when applying and to utilise the correct corporeality.
Before starting any glue up consider first what yous're going to need to hold your piece together, maybe it's a few clamps, or maybe it'southward tape. Make sure y'all have your supplies close at hand before starting annihilation, it's a existent hurting to scramble afterwards for that last clench.
When you're ready to glue apply a bead forth your piece of work surface, and so drag your finger along the bead to evenly spread out the mucilage.
Since mucilage tin cause forest to swell where information technology's applied it'south important to articulation the pieces quickly afterward glue application, this is peculiarly truthful for joints that accept tight tolerances.
Pace 5: Clamping + Cauls
One time the surfaces are glued together y'all can clamp your work until the glue has set. When clamping it's good to apply pressure to the pieces existence glued, but over-tightening tin cause too much glue to squeeze out the pieces may not bail.
For some pieces you may demand clamping pressure on the top and bottom to keep your pieces level or aligned. Adding straight scrap pieces to the superlative and lesser of your glue upwards, and and then clamping them in place, can help keep your piece of work stable and level. These wood pieces that transverse the glue-upwards on the elevation and lesser are called cauls.
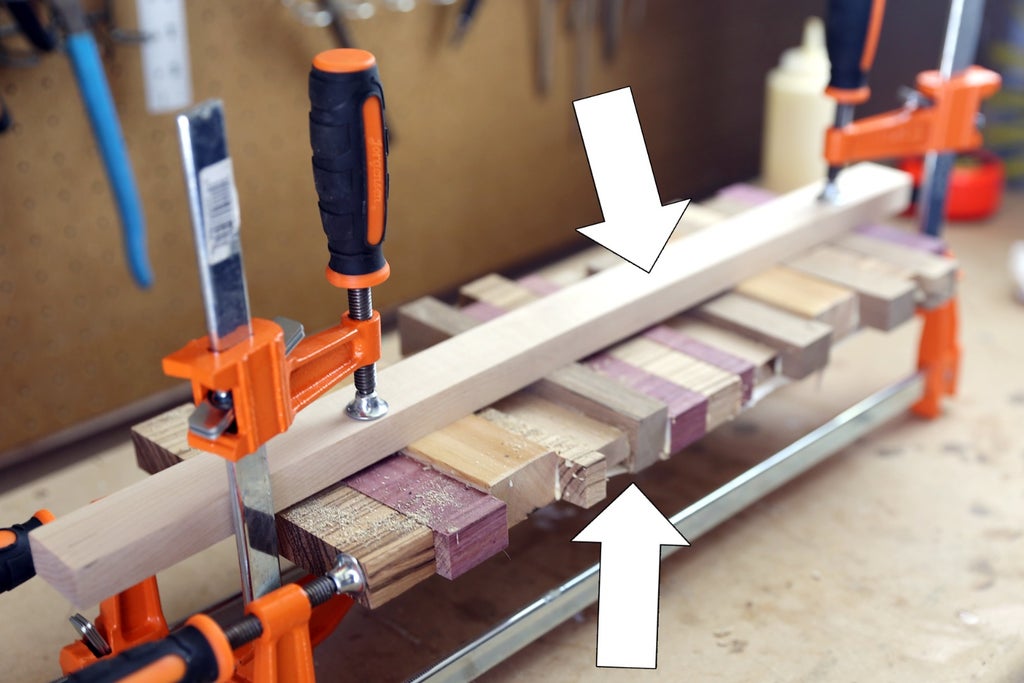
Cauls added to peak and bottom of clamped piece
To make things even easier for cleanup yous tin add a barrier of newspaper betwixt the cauls and your work and so you don't accidentally glue them together.
When tightening your clamps make sure non to over-tighten, which not only squeezes out all the gum, but tin also paring and harm your piece of work.
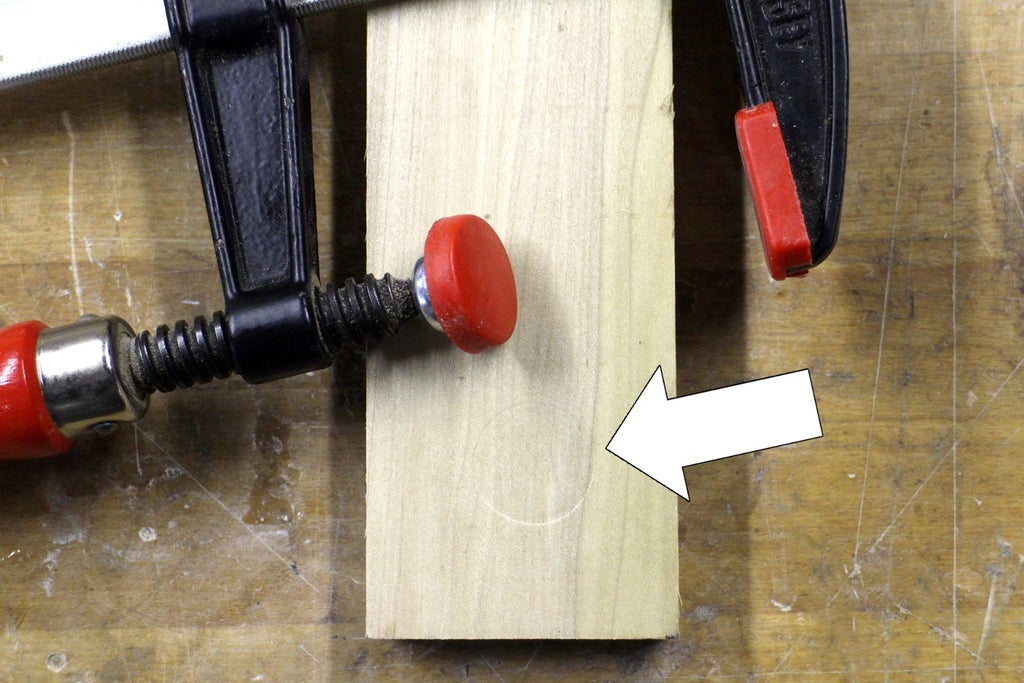
Dent in wood caused from over-tightening
Footstep six: Quiz - All About Glue
{ "id": "quiz-1", "question": "PVA glue stands for Pliable Very Adhesive glue", "answers": [ { "title": "True", "correct": fake }, { "title": "False", "correct": true } ], "correctNotice": "Correct! PVA glue stands for polyvinyl acetate.", "incorrectNotice": "That's incorrect" } { "id": "quiz-2", "question": "End grain glue ups are simply equally potent equally directly grain mucilage ups", "answers": [ { "title": "True", "correct": false }, { "title": "Imitation", "correct": truthful } ], "correctNotice": "Correct! End grain glue ups are much weaker and require a special articulation or mechanical fastener to make a good connection.", "incorrectNotice": "That's incorrect" } { "id": "quiz-iii", "question": "When clamping a mucilage up it'southward best to squeeze the pieces together very tightly until virtually all the glue seeps out.", "answers": [ { "title": "Clench until you tin can't aply any more pressure.", "correct": false }, { "championship": "Clamp firmly, only not so tight every bit to remove all gum from articulation.", "correct": truthful } ], "correctNotice": "Right! Squeezing a glue up also tightly will remove all the glue in the mucilage upwardly and forbid adhesion, and very tight clamping tin can cause indents to the wood.", "incorrectNotice": "That'south wrong" } { "id": "quiz-iv", "question": "Why should you avoid using a clammy sponge or towel to make clean up excess PVA gum after information technology's been practical?", "answers": [ { "title": "Wet from the damp sponge or towel can cause the wood to great and deform.", "correct": true }, { "title": "Water can splash around and make a big mess.", "correct": false }, { "championship": "PVA glue is not h2o soluble.", "correct": false } ], "correctNotice": "Correct! When introduced to water wood can swell and deform. While this isn't terrible, it can stand for more finishing work afterwards.", "incorrectNotice": "That's incorrect" } Pace 7: Glue Cleanup From Wood
One of the best methods to remove excess glue from your work slice is to rub sawdust all over the articulation. The sawdust volition mix with the glue and clump together, making cleanup a breeze. You should avoid using a moisture towel or sponge as moisture causes woods to swell and likewise much might deform your work. Sawdust is an easy and readily bachelor solution to glue cleanup.
It is important to clean upward the extra glue as before long equally possible since wood that absorbs glue will stain differently than the residuum of the wood.
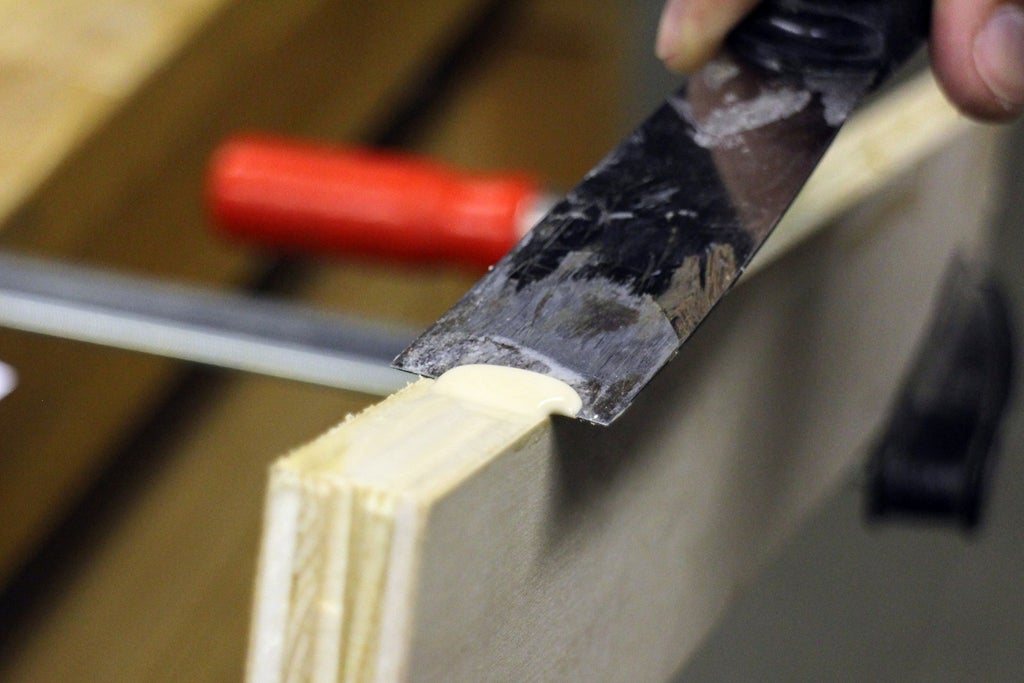
A putty knife makes a great tool for both gum awarding and make clean upward
Some other not bad method for applying and cleaning glue is a putty knife, the apartment surface does a great job of evenly spreading glue over your surface and the sharp edge makes cleaning upwards backlog gum easy.
Stride 8: Glue Cleanup From Easily
If you become whatever glue on your hands after your piece is secure you tin can easily remove information technology by just rubbing your hands together. Wet or still damp glue should just chip off.
Pace 9: Wrap Upwards
PVA glue is invaluable to a woodworker, and can offer much more strength to wood when bonding forth the grain than mechanical fasteners.
However, mucilage is not the solution to always trouble a woodworker will confront. In the side by side lessons we'll acquire nearly drilling openings, which and so can be used for mechanical fasteners similar screws; perfect for applications where you don't desire to rely on gum.
39 People Made This Project!
Recommendations

Is Super Glue Fix All Adhesive Resistant To Petro,
Source: https://www.instructables.com/All-About-Glue/
Posted by: southanduke42.blogspot.com
0 Response to "Is Super Glue Fix All Adhesive Resistant To Petro"
Post a Comment